I promised to write about making your WordPress blog look the way you want…if there was enough interest, and sure enough, there was!
This post is the first in a series called “WordPress for the Everyday Blogger.” Why the Prelude before jumping into Part 1? Because this post will deal with those who are making the transition to WordPress from another blogging platform. I myself had a heckuva time transporting my blog from Squarespace to WordPress (mostly because I had over 1,000 posts!) and wanted to document the transition for others who wanted to do the same. I also know that this post will benefit at least three blogger friends of mine — Bien Living Design, OMG I’m a Mom, and Two Wishes — who are about to, or in the process of making the transition to WordPress.
This will also probably be the longest post in my “WordPress for the Everyday Blogger” series, so please bear with me!
1. Export your old blog posts.
If you are making the switch to WP from another blogging platform, rest assured that practically every blogging platform allows you to export your posts so that you can import the entries to your new blog.
If you are not sure how to export your blog data, go check your blogging platform’s FAQs.
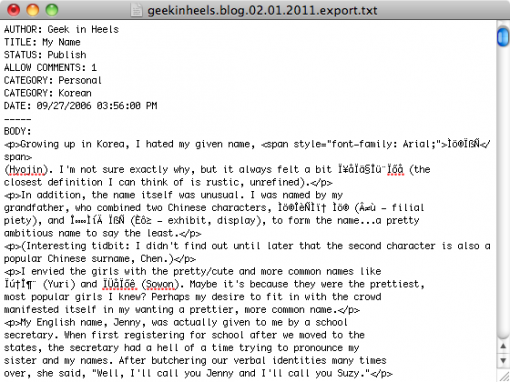
For Squarespace, go to Structure Editing Mode, then click on “configure this page” and scroll down to the “Data Export” section. You should end up with a text document that looks similar to this:
That was easy enough, right? Wrong! Because the file you have downloaded has the URL paths to your media (ie, all the photos you have uploaded) but not the files themselves.
The good news is that most of the time, you can easily download the files via FTP. (My favorite FTP client is Cyberduck. It is easy to use and the yellow duck icon looks mighty cute in my dock. However, its Windows version is still in beta so if you’re a Windows user who prefers a more stable version, I recommend FileZilla. Not sure what FTP is? Go check out FTP for Beginners.) I suggest that you keep your media in their folders and upload them the same exact way so that you do not need to change the URL paths in your existing blog posts.
The bad news is that not all blogging platforms support FTP. This was the case with Squarespace, with whom I had been hosting my blog.
Luckily, I have a lifetime account with Squarespace so I chose to keep my old files there and just change the paths to those files (more on that later). If you choose not to do this, you will need to download all your files one-by-one. Not fun.
2. Edit your exported blog data accordingly.
You can choose to keep your old URL structure and everything will be easy-peasy. For example, my Squarespace blog was at https://www.geekinheels.com/blog/ so I could’ve installed my new WordPress blog at that directory too.
However, I wanted my new blog’s URL structure to omit the “/blog” portion — in other words, I wanted my WordPress blog to be at my domain’s root directory.
So I performed a search and replace on the blog data file I had exported, replacing all instances of:
geekinheels.com/blog/
with:
geekinheels.com/
And because I was keeping my old photos at Squarespace, I replaced the existing URL paths to my media to the new Squarespace URL. In this case, because all my media were stored in the /storage directory, I replaced all instances of:
/storage/
with:
https://www.geekinheels.com/wp-content/uploads/old/
If you have a good text editor (I use TextWrangler), you can use the find and replace function to even get rid of additional image formatting, extra line spacing…practically anything you want! Note that TextWrangler supports Grep patterns in their “Find” function, which I found highly useful in this step. (I will not get into Grep patterns here but if you want to use it and are confused, just let me know and I will try my best to help.)
3. Upload your old blog data & files to your new blog.
I am now going to assume that you have installed WordPress (if you’re not sure how, go check out Installing WordPress). Once you are logged into the Dashboard, click on the “Tools” menu on the left and select “Import.” Follow the instructions and voilà — all your old posts should now be imported.
If you have media you need to upload, upload them to your new host using the same exact folder structure. If you do not, all your images will show up as broken links.
4. Redirect your old blog URL to the new URL (if needed).
Caution: be very, very careful when doing this step!
As mentioned above, my old blog URL was https://www.geekinheels.com/blog/ and I wanted my new blog’s URL to be rid of the “/blog/” part.
But since all my old posts begin with https://www.geekinheels.com/blog/...., I needed to create a 301 redirect — which tells the internet that the URL has moved permanently — to have all my old URLs redirect to my new one.
To do this I had to edit my website’s .htaccess file. Many FTP clients won’t show the .htaccess file by default, so using Cyberduck, I navigated to my domain’s root directory, went to “View” in the menu and selected “Show Hidden Files.”
Even when you download the .htaccess file you may not be able to see it on your computer. So I downloaded it using the “Download As” option and saved it as 1.htaccess.
I opened the file using a text editor (such as TextWrangler) and added the following line to the bottom of the file:
redirect 301 "/blog/" https://www.geekinheels.com/
This essentially tells the internet that everytime someone tries to visit
https://www.geekinheels.com/blog/....
they should be redirected to:
https://www.geekinheels.com/....
So for example, if you type in:
https://www.geekinheels.com/blog/2010/12/29/the-beauty-of-pixar.html
you will automatically be redirected to:
https://www.geekinheels.com/2010/12/29/the-beauty-of-pixar.html
After adding the line to the 1.htaccess file I uploaded it to my root directory, and renamed it to .htaccess which replaced my old .htaccess file.
5. Change your permalink structure to match your old blog’s.
Again, this is to ensure that all the visitors who are coming to your blog through another website — including Google, since you don’t know when it will crawl your blog next — will not end up at a 404 Error (not found) page.
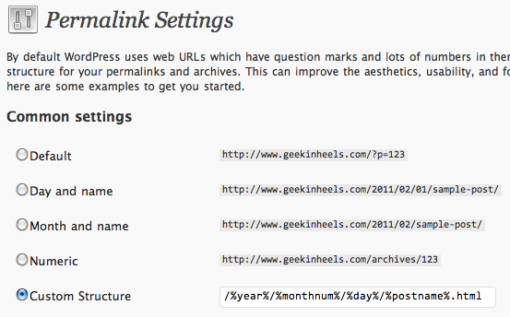
After logging into your WordPress Dashboard, go to “Settings” on the left menu and click on “Permalinks.” Examine your old blog’s URL structure and copy it into the “Custom Structure” field.
In my case, my old Squarespace URL structure looked like this:
https://www.geekinheels.com/blog/year/month/day/post-name.html
Very similar to WordPress’ “Day and name” option, but the Squarespace URL has a .html at the end.
So I changed my WordPress installation’s URL structure to this:
https://www.geekinheels.com/%year%/%monthnum%/%day%/%postname%.html
I did not worry about the “/blog/” in the middle of the URL since I took care of that in the previous step.
Note that in the field above, you only need to type in /%year%/%monthnum%/%day%/%postname%.html
6. Double-check everything.
Even if you have performed multiple find and replace commands, even if you tried your best to keep all the URLs the same, it is likely that your new blog still contains some broken URLs, images that are not showing up, etc.
I have found that the best way to combat this is through the use of two plugins: Broken Link Checker and Redirection.
Broken Link Checker does exactly what its title implies. It goes through all the links in your WordPress installation (including images) and gives you a list of what is not working. Its nifty interface lets you ignore the broken link, correct it, or remove the link right from its Dashboard page.
What if you don’t want to correct a broken link, but you want to re-route it instead? What if you want to make sure that every time someone tries to go to a certain URL in your domain, they will be re-routed to another URL? That’s where the Redirection plugin comes in handy. Instead of messing with .htaccess files to create URL redirects for every broken link, this plugin lets you do that via an easy-to-use interface.
I recommend that you keep these two plugins activated even after the successful transfer of your blog. When you have as many posts as I do (and links!), there are bound to be new broken links on a regular (in my case, daily) basis.
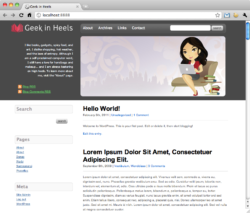
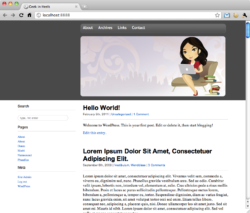
Using the steps above, I was able to transfer my Squarespace blog (with over 1,000 posts) to WordPress in just one night. But importing your old blog is just the first step. Starting with the next part in this series, I will show you how I made my WordPress theme!


 I like books, gadgets, spicy food, and art. I dislike shopping, hot weather, and the laws of entropy. Although I am a self-proclaimed computer nerd, I still have a love for handbags and makeup... and I am always teetering on high heels. To learn more about me, visit the


I’m helping Mandy with hers, but can’t figure out one (stupid) thing. Since WP is installed via a new host on her current domain (currently redirected to Blogger), how do you connect to the WP install before redirecting the domain to the new WP path?
I’m not sure I’m following you. 🙁 Do you mean that you have a web host, but the domain is not yet connected to the web host? What company are you using for the web host? They should have given you (or Mandy) the information to access the server when signing up. I would install everything first then re-direct the domain URL to the new host.
Not quite. She signed up for a domain through Godaddy, then bought hosting. Cool. So I went out and installed WordPress, no problem. Now, however, the domain points to the Blogger account, so not sure how to access WordPress? When I did my own, I moved to a new domain at the same time I moved to hosted WordPress, so I didn’t have to repoint anything. (I don’t think. Now I’m not sure. Can I blame pregnancy blame?)
Perhaps the confirmation email will straighten this all out.
Ahh got it. I think what’s happening is that although the WordPress files are there, everything is being overridden by the 301 redirect to her Blogger account. I think you may need to remove the redirect in order to access WordPress, which means that her existing blog will only be accessible via the Blogger URL until everything is transferred to WordPress.
My suggestion is to create her WordPress blog offline using a local test server (see here to find out how), and once you’re done, remove the 301 redirect, then transfer all the files online. This way there will be minimal downtime.
That is so helpful, thanks. And can’t wait to catch up with your other WP posts. I broke my feed because of the Squarespace “blog” thing, and it just occurred to me yesterday that I probably broke all links as well. Glad to see there’s a simple fix!
Glad I could be of help! I should also mention that I added two more lines to my .htaccess file to redirect my old RSS feed to my new one. Since the default WordPress RSS feed URL ends in
/feed/, I added the following lines:redirect 301 "/blog/atom.xml" http://www.geekinheels.com/feed/redirect 301 "/blog/rss.xml" http://www.geekinheels.com/feed/(This is in addition to the
redirect 301 "/blog/" http://www.geekinheels.com/line I mention above in the post.)Adding those two lines ensures that even when I made a FeedBurner account, my old subscribers were automatically redirected to my new feed. Hope that helps!
Oh my goodness, Jenny, I think you just fixed my feed troubles! Don’t have the energy to put up a test post at the moment, but all signs point to it working now. Thanks for being such a huge help to those of us who are severely challenged on the coding front!!