
Prelude
Part 1: Setting Up
Part 2: Set the Bare Bones
Part 3: The Header
Part 4: The Main Menu
In this post I will discuss how to complete the rest of the header elements in my blog theme.
First up: the searchbar.
In WordPress, adding a searchbar is relatively simple. All you need to do is insert the line <?php get_search_form(); ?> into wherever you want the searchbar to be.
So in this case, since I want the searchbar to be included in the header section, I opened up the header.php file and created a new div called “searchbar” like so:
<div id="searchbar">
 <?php get_search_form(); ?>
 </div>
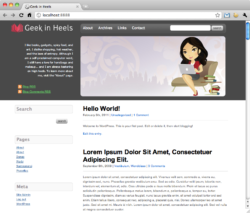
I just added that to the very end of the header.php file, then saved. Here is what I ended up with:

Right. Not exactly how I want it.
The good news is that from here on, all I need to do is use some CSS to modify the position and size of the “searchbar” element:
#searchbar {
position: absolute;
margin: -15px 0 0 632px;
overflow: visible;
width: 230px;
z-index: 1;
}

Keep playing around with the position and size until you get your desired effect. At this point, you can leave the searchbar the way it is (without an actual “search” button), but if you’re anal and like to make things difficult (like me!), you may choose to add a button next to the search field. Here is the CSS I used (this replaces the searchform CSS in the original style.css file):
#searchform {
 margin: 0;
 padding: 14px 0 20px;
 }
#searchform input#s {
 margin: 0;
 padding: 4px 8px;
 width: 150px;
 border: 1px solid #FFFFFF;
 color: #828282;
 -moz-border-radius: 6px;
 -khtml-border-radius: 6px;
 -webkit-border-radius: 6px;
 border-radius: 6px;
 }
#searchsubmit {
 margin-top: -2px;
 padding: 0;
 width: 50px !important;
 height: 24px;
 background: url('/images/search_button.png');
 border: none;
 line-height: 1px;
 font-size: 1px !important;
 vertical-align: top;
 cursor: pointer;
 }
#searchform label {
 display: none;
 }
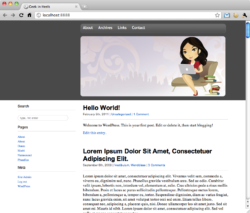
Lastly, you need to delete the searchform.php file within the theme’s file folder since this file is what makes the search button disappear in the ET-Starter theme. (The presence of this file dictates how a search should work, but WordPress search works just fine without it.)
Your theme should now look like this:

Now, onto the left portion of the header.
In order to do this, all I did was create another div called “headerleft” and added it to the end of my header.php file. I then filled in the content within the div and saved the header.php file. Here is exactly what I added to the end of header.php:
<div id="headerleft">
<a href="https://www.geekinheels.com/"><img src="/images/title.png" border=0 width="262" height="45"></a>
<div id="profileblurb">
I like books, gadgets, spicy food, and<br />
 art. I dislike shopping, hot weather,<br />
 and the laws of entropy. Although I<br />
 am a self-proclaimed computer nerd,<br />
 I still have a love for handbags and<br />
 makeup... and I am always teetering<br />
 on high heels. To learn more about<br />
 me, visit the "About" page.
</div>
<div id="feedlinks">
<ul class="feed-list-inline">
<li><a href="http://feeds.feedburner.com/geekinheels/blog" class="feed-link">Blog RSS</a></li>
<li><a href="http://feeds.feedburner.com/geekinheels/comments" class="feed-link">Blog Comments RSS</a></li>
</ul>
</div>
</div>
As you can see in the HTML, I added a bunch of CSS IDs and classes. This will come in handy in the next step, because leaving the file as is will leave you with this mess:

So in order to play around with the positioning and formatting, you will need to return to your style.css file. Here is what I added:
#headerleft {
 position: absolute;
 overflow: visible;
 top: 9px;
 margin-left: -30px;
 width: 220px;
 }
#profileblurb {
 position: absolute;
 overflow: visible;
 top: 84px;
 margin-left: 40px;
 width: 220px;
 color: #FFFFFF;
 font-family: Verdana, sans-serif;
 font-size: 11px;
 line-height: 1.72em;
 text-align: right;
 }
#feedlinks {
 margin-left: 2px;
 padding: 0;
 position: absolute;
 overflow: visible;
 top: 256px;
 line-height: 1.7em;
 }
#feedlinks a:link, #feedlinks a:visited, #feedlinks a:active {
 color: #66CC66;
 text-decoration: underline;
 }
#feedlinks a:hover {
 color: #66FF66;
 }
.feed-list-inline li {
 margin: 0;
 padding-left: 20px;
 background: url('/images/feed-icon-16x16-orange.png') no-repeat center left;
 list-style: none;
 }
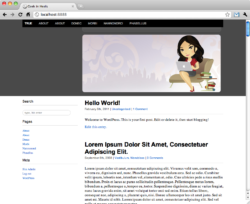
And that should do it! Your theme should now look like this:

Stay tuned for the next post in this series: the sidebar!

 I like books, gadgets, spicy food, and art. I dislike shopping, hot weather, and the laws of entropy. Although I am a self-proclaimed computer nerd, I still have a love for handbags and makeup... and I am always teetering on high heels. To learn more about me, visit the


I think these posts are so helpful! This is a random question but where did you get your “see also” plugin you have at the end of each post? Is it a wordpress plugin?
That’s actually a blogging widget called LinkWithin (http://www.linkwithin.com/) which supports various blogging platforms. I did some additional formatting via CSS to make it look the way it is (eg, the fade-in effect).
Wow, thanks so much for the super prompt response! You’re awesome! 🙂